ページ

2013年11月30日土曜日

RaspberryPiと戯れてみる 7 - VPN再チャレンジ -

VPN再チャレンジ!!


有識者の方のありがたい助言をいただき、どうもdocomoの回線からVPN接続した場合
PPTPをサポートしていなさげらしいorz。

なので、「L2PTを使用するべし」というお言葉を頂きました。

・L2PT  http://e-words.jp/w/L2TP.html
・PPP http://e-words.jp/w/PPP.html

先生に聞いてみると以下参考サイトを発見
http://www.majishini.net/wp/?p=394

まずは、IPアドレスを固定で使用する様に設定。
参考サイト
http://www.hiramine.com/physicalcomputing/raspberrypi/setup_staticip.html

pi@raspberrypi /etc/network $ diff interfaces interfaces.org
4,7c4
< iface eth0 inet static
< address 192.168.0.4
< netmask 255.255.255.0
< gateway 192.168.0.1
---

> iface eth0 inet dhcp

sysctl.congの編集と反映

pi@raspberrypi /etc $ sudo vi sysctl.conf
pi@raspberrypi /etc $ sudo sysctl -p
kernel.printk = 3 4 1 3
vm.swappiness = 1
vm.min_free_kbytes = 8192
net.ipv4.ip_forward = 1
net.ipv4.conf.all.send_redirects = 0
net.ipv4.conf.all.accept_redirects = 0
net.ipv4.conf.default.send_redirects = 0
net.ipv4.conf.default.accept_redirects = 0
net.ipv4.conf.eth0.send_redirects = 0
net.ipv4.conf.eth0.accept_redirects = 0
net.ipv4.conf.lo.send_redirects = 0

net.ipv4.conf.lo.accept_redirects = 0

/etc/ipsec.confの編集

pi@raspberrypi /etc $ sudo cp -p ipsec.conf ipsec.conf.org
pi@raspberrypi /etc $ sudo vi ipsec.conf
pi@raspberrypi /etc $ diff ipsec.conf ipsec.conf.org 
43,61d42
< conn L2TP
<        keyingtries=0
<        type=transport
<        compress=yes
<        authby=secret
<        forceencaps=yes
<        pfs=no
<        auto=add
<        ike=aes-sha1;modp3072
<        phase2=esp
<        phase2alg=aes-sha1;modp3072
<        rekey=no
<        salifetime=3h
<        ikelifetime=1h
<        left=192.168.0.4 # Raspberry PiのIPアドレスにする
<        leftprotoport=17/1701
<        right=%any
<        rightprotoport=17/%any
pi@raspberrypi /etc $ 

/etc/ipsec.secretsの編集

pi@raspberrypi /etc $ sudo diff ipsec.secrets ipsec.secrets.org
11,12d10
< 192.168.0.4 %any: PSK "XXXXXX"
pi@raspberrypi /etc $ 

openswan再起動とベリファイチェック

pi@raspberrypi /etc $ sudo service ipsec restart
ipsec_setup: Stopping Openswan IPsec...
ipsec_setup: Starting Openswan IPsec 2.6.37...
ipsec_setup: No KLIPS support found while requested, desperately falling back to netkey
ipsec_setup: NETKEY support found. Use protostack=netkey in /etc/ipsec.conf to avoid attempts to use KLIPS. Attempting to continue with NETKEY
pi@raspberrypi /etc $ sudo ipsec verify
Checking your system to see if IPsec got installed and started correctly:
Version check and ipsec on-path                             [OK]
Linux Openswan U2.6.37/K3.6.11+ (netkey)
Checking for IPsec support in kernel                        [OK]
 SAref kernel support                                       [N/A]
 NETKEY:  Testing XFRM related proc values                  [OK]
[OK]
[OK]
Checking that pluto is running                              [OK]
 Pluto listening for IKE on udp 500                         [OK]
 Pluto listening for NAT-T on udp 4500                      [OK]
Checking for 'ip' command                                   [OK]
Checking /bin/sh is not /bin/dash                           [WARNING]
Checking for 'iptables' command                             [OK]
Opportunistic Encryption Support                            [DISABLED]

xl2tpdの設定

pi@raspberrypi /etc/xl2tpd $ sudo vi xl2tpd.conf
pi@raspberrypi /etc/xl2tpd $ sudo diff xl2tpd.conf xl2tpd.conf.org 
77,86d76
< [global]
< port = 1701
< [lns default]
< ip range = 192.168.0.201 - 192.168.0.210
< local ip = 192.168.0.4
< length bit = yes
< refuse chap = yes
< require authentication = yes
< pppoptfile = /etc/ppp/l2tpd.pppopt
pi@raspberrypi /etc/xl2tpd $ 

pppoptfileの作成

pi@raspberrypi /etc/xl2tpd $ sudo vi /etc/ppp/l2tpd.pppopt
pi@raspberrypi /etc/xl2tpd $ sudo cat /etc/ppp/l2tpd.pppopt
asyncmap 0
auth
crtscts
lock
modem
debug
proxyarp
lcp-echo-interval 180
lcp-echo-failure 3

refuse-pap
refuse-chap
refuse-mschap
require-mschap-v2

ms-dns 192.168.0.1

pppd認証の設定

pi@raspberrypi /etc/ppp $ sudo diff chap-secrets chap-secrets.org 
3c3
< XXXXXX * XXXXXX *
---
pi@raspberrypi /etc/ppp $ 

自宅ルータの設定


あとはAndroid端末から接続・・・

うまく繋がりました!!


☝️自宅Raspberry Piのredmineへ接続している様子
ここまで長かった〜orz

ついでにファイルサーバもインストール

sambaを導入。

参考サイト
http://assimane.blog.so-net.ne.jp/2013-03-30

pi@raspberrypi ~ $ sudo apt-get install samba
パッケージリストを読み込んでいます... 完了
依存関係ツリーを作成しています                
状態情報を読み取っています... 完了
以下の特別パッケージがインストールされます:
  tdb-tools
提案パッケージ:
  openbsd-inetd inet-superserver smbldap-tools ldb-tools ctdb
以下のパッケージが新たにインストールされます:
  samba tdb-tools
アップグレード: 0 個、新規インストール: 2 個、削除: 0 個、保留: 0 個。
3,332 kB のアーカイブを取得する必要があります。
この操作後に追加で 20.1 MB のディスク容量が消費されます。
続行しますか [Y/n]? y
取得:1 http://mirrordirector.raspbian.org/raspbian/ wheezy/main samba armhf 2:3.6.6-6+deb7u1 [3,307 kB]
取得:2 http://mirrordirector.raspbian.org/raspbian/ wheezy/main tdb-tools armhf 1.2.10-2 [25.9 kB]
3,332 kB を 5秒 で取得しました (601 kB/s)
パッケージを事前設定しています ...
以前に未選択のパッケージ samba を選択しています。
(データベースを読み込んでいます ... 現在 70009 個のファイルとディレクトリがインストールされています。)
(.../samba_2%3a3.6.6-6+deb7u1_armhf.deb から) samba を展開しています...
以前に未選択のパッケージ tdb-tools を選択しています。
(.../tdb-tools_1.2.10-2_armhf.deb から) tdb-tools を展開しています...
man-db のトリガを処理しています ...
samba (2:3.6.6-6+deb7u1) を設定しています ...
Generating /etc/default/samba...
グループ `sambashare' (グループ ID 113) を追加しています...
完了。
update-alternatives: /usr/bin/smbstatus (smbstatus) を提供するために 自動モード で /usr/bin/smbstatus.samba3 を使います
[ ok ] Starting Samba daemons: nmbd smbd.
tdb-tools (1.2.10-2) を設定しています ...
update-alternatives: /usr/bin/tdbbackup (tdbbackup) を提供するために 自動モード で /usr/bin/tdbbackup.tdbtools を使います

pi@raspberrypi ~ $ 
pi@raspberrypi ~ $ sudo apt-get install samba-common-bin
パッケージリストを読み込んでいます... 完了
依存関係ツリーを作成しています                
状態情報を読み取っています... 完了
以下のパッケージが新たにインストールされます:
  samba-common-bin
アップグレード: 0 個、新規インストール: 1 個、削除: 0 個、保留: 0 個。
2,690 kB のアーカイブを取得する必要があります。
この操作後に追加で 15.9 MB のディスク容量が消費されます。
取得:1 http://mirrordirector.raspbian.org/raspbian/ wheezy/main samba-common-bin armhf 2:3.6.6-6+deb7u1 [2,690 kB]
2,690 kB を 3秒 で取得しました (866 kB/s)     
以前に未選択のパッケージ samba-common-bin を選択しています。
(データベースを読み込んでいます ... 現在 70100 個のファイルとディレクトリがインストールされています。)
(.../samba-common-bin_2%3a3.6.6-6+deb7u1_armhf.deb から) samba-common-bin を展開しています...
man-db のトリガを処理しています ...
samba-common-bin (2:3.6.6-6+deb7u1) を設定しています ...
update-alternatives: /usr/bin/nmblookup (nmblookup) を提供するために 自動モード で /usr/bin/nmblookup.samba3 を使います
update-alternatives: /usr/bin/net (net) を提供するために 自動モード で /usr/bin/net.samba3 を使います
update-alternatives: /usr/bin/testparm (testparm) を提供するために 自動モード で /usr/bin/testparm.samba3 を使います
pi@raspberrypi ~ $ 

設定ファイルの更新

pi@raspberrypi ~ $ sudo cp -p /etc/samba/smb.conf /etc/samba/smb.conf.org
pi@raspberrypi ~ $ sudo vi /etc/samba/smb.conf
pi@raspberrypi ~ $ sudo diff /etc/samba/smb.conf /etc/samba/smb.conf.org
334,341d333
< [share]
< comment = share drive
< read only = no
< locking = no
< path = /home/pi/share
< guest ok = yes
< force user = pi
pi@raspberrypi ~ $ 


パスワードの設定と再起動

pi@raspberrypi ~ $ sudo smbpasswd -a pi
New SMB password:
Retype new SMB password:
Added user pi.
pi@raspberrypi ~ $ sudo service samba restart
[ ok ] Stopping Samba daemons: nmbd smbd.
[ ok ] Starting Samba daemons: nmbd smbd.

パスワード : sanji

ドヤから確認し、無事アクセスできました。


iPad mini retina購入

思い切りすぎてiPad mini retina購入


色はスペースグレイ、容量は16Gのモデルを購入。
カバーは純正のSmart Coverにしてみました。また、Smart Cover自体が
全面しかカバーしてくれないので、Smart Coverと併用できる裏面カバーも
購入。


まったく関係ないハウステンボスで購入したシャンクスの旗と一緒に撮影。


カバーを開けるとこんな感じ。


Smart Coverはスタンドにもなるそうな。


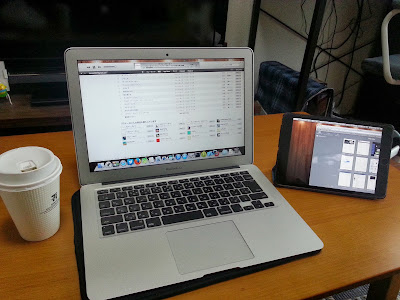
現在の一番活用法はmac book air のマルチディスプレイとして活用。
両方にAirDisplayをインストール。

また、nasneに入っている番組をipadで見れたりする
Media Link Player for DTVもインストール。快適な感じ。

2013年11月24日日曜日

RaspberryPiと戯れてみる 6 - Redmine自動バックアップ -

redmineの自動バックアップ

redmineのバックアップには
・redmine/files
・database
のバックアップが必要
http://t2wonderland.blogspot.jp/2013/02/redmine-redmine.html

1. files配下のバックアップ

redmine/filesはどこにあるか探した所、
/var/lib/redmine/default/files
にありました。

pi@raspberrypi /usr/backup/redmine $ sudo tar -cvzf /usr/backup/redmine/files_`date +%Y%m%d`.tgz /var/lib/redmine/default/files
tar: メンバ名から先頭の `/' を取り除きます
/var/lib/redmine/default/files/
/var/lib/redmine/default/files/131124140554_Puzzle.xlsx
files配下をtarファイルに圧縮するコマンドを実行。
tarファイルが作成されています。

2. databaseのバックアップ

参考サイトを元にダンプファイルを作成するコマンドを実行してみた所、
pi@raspberrypi /usr/backup/redmine $ sudo mysqldump -uredmine -pspice redmine > ./db_`date +%Y%m%d`.dump
mysqldump: Got error: 1045: ユーザー 'redmine'@'localhost' を拒否します.uUsing password: YES) when trying to connect

怒られてしまいましたorz。
はて?な感じなので普通にログインしてみる
pi@raspberrypi /usr/backup/redmine $ mysql -uredmine -pXXXX
ERROR 1045 (28000): ユーザー 'redmine'@'localhost' を拒否します.uUsing password: YES)

パスワードが違うとの事ですが、パスワードは合っています。

pi@raspberrypi /usr/backup/redmine $ mysql -u root -p
Enter password: 
Welcome to the MySQL monitor.  Commands end with ; or \g.
Your MySQL connection id is 50
Server version: 5.5.31-0+wheezy1 (Debian)

Copyright (c) 2000, 2013, Oracle and/or its affiliates. All rights reserved.

Oracle is a registered trademark of Oracle Corporation and/or its
affiliates. Other names may be trademarks of their respective
owners.

Type 'help;' or '\h' for help. Type '\c' to clear the current input statement.

mysql> select user, host, password from user;
ERROR 1046 (3D000): データベースが選択されていません.
mysql> show databases;
+--------------------+
| Database           |
+--------------------+
| information_schema |
| mysql              |
| performance_schema |
| redmine_default    |
| test               |
+--------------------+
5 rows in set (0.01 sec)

mysql> use redmine_default;
Reading table information for completion of table and column names
You can turn off this feature to get a quicker startup with -A

Database changed
mysql> select user, host, password from user;
ERROR 1146 (42S02): Table 'redmine_default.user' doesn't exist
mysql> use mysql;
Reading table information for completion of table and column names
You can turn off this feature to get a quicker startup with -A

Database changed
mysql> select user, host, password from user;
+------------------+-------------+-------------------------------------------+
| user             | host        | password                                  |
+------------------+-------------+-------------------------------------------+
| root             | localhost   | *7E4342FF084A70DD409EAB26EC7F6360D80F12BC |
| root             | raspberrypi | *7E4342FF084A70DD409EAB26EC7F6360D80F12BC |
| root             | 127.0.0.1   | *7E4342FF084A70DD409EAB26EC7F6360D80F12BC |
| root             | ::1         | *7E4342FF084A70DD409EAB26EC7F6360D80F12BC |
|                  | localhost   |                                           |
|                  | raspberrypi |                                           |
| debian-sys-maint | localhost   | *24EC3DF32614F55A010429412599E3D93437737E |
| redmine_default  | localhost   | *3BA1B4133A1E16B59311B1B379C2E78F19627CFE |
+------------------+-------------+-------------------------------------------+
8 rows in set (0.00 sec)

mysql> quit;
Bye
rootでmysqlへログインし、設定されているユーザ名とパスワード一覧を表示してみる事に
すると「redmine」ではなく「redmine_default」らしい。

これをふまえてmysqlのダンプ出力コマンドは、
pi@raspberrypi /usr/backup/redmine $ sudo mysqldump -uredmine_default -pXXXX redmine_default > ./db_`date +%Y%m%d`.dump
でダンプ出力ができました。

cronでバックアップしようと思ったのですが、今は未だ24時間起動しっぱなしでは無い為、
手動で行う事にしました。
ログイン時に自動でバックアップしてくれるように ~/.profileを編集
sudo /usr/backup/redmine/backup_redmine.sh
上記を一番下に追加しました。
これでpiユーザでログインする度に自動でバックアップが行われます。

2013年11月9日土曜日

RaspberryPiと戯れてみる 5 - Redmine SCM Repository Creation Plugin -

Redmine関連調査


前回、SCM Repository Creation pluginをインストールしてみたが、
リポジトリが作成できない。

そこでログを見てみる事に。
/var/log/redmine/default/production.log

Processing RepositoriesController#create (for 192.168.0.4 at 2013-11-09 10:25:32) [POST]
  Parameters: {"authenticity_token"=>"MKNJS+kSPag72DRzkCOd1c8JqoZO/jO07K7cWl3mgPw=", "repository_scm"=>"Git", "repository"=>{"is_default"=>"1", "identifier"=>"bibo", "url"=>"/var/www/repos/git/bibo-rock.git.0", "path_encoding"=>"", "extra_report_last_commit"=>"0"}, "commit"=>"リポジトリの作成", "operation"=>"add", "controller"=>"repositories", "action"=>"create", "project_id"=>"bibo-rock"}
Creating reporitory: /var/www/repos/git/bibo-rock.git.0.git

NoMethodError (undefined method `created_with_scm=' for #<Repository::Git:0x2544db0>):
  /usr/lib/ruby/vendor_ruby/active_record/attribute_methods.rb:270:in `method_missing'
  /usr/lib/ruby/vendor_ruby/action_controller/base.rb:1333:in `perform_action'
  /usr/lib/ruby/vendor_ruby/action_controller/filters.rb:617:in `call_filters'
  /usr/lib/ruby/vendor_ruby/action_controller/filters.rb:610:in `perform_action_with_filters'

NoMethodErrorが出ている?
google先生に聞いてみると、
rake redmine:plugins:migrate RAILS_ENV=production
このコマンドを実行してないのでは?というが前回実行したはず。
もう一度実行。するとabortしているorz
どうやらコマンドがredmineのバージョンによって異なるみたい。
http://stackoverflow.com/questions/13194653/rake-redminepluginsmigrate-is-not-executing

正しいコマンドで実行。
pi@raspberrypi /usr/share/redmine $ sudo rake db:migrate_plugins RAILS_ENV=production
NOTE: Gem.source_index is deprecated, use Specification. It will be removed on or after 2011-11-01.
Gem.source_index called from /usr/share/redmine/vendor/rails/railties/lib/rails/gem_dependency.rb:21.
Migrating engines...
Migrating acts_as_activity_provider...
Migrating acts_as_attachable...
Migrating acts_as_customizable...
Migrating acts_as_event...
Migrating acts_as_list...
Migrating acts_as_searchable...
Migrating acts_as_tree...
Migrating acts_as_versioned...
Migrating acts_as_watchable...
Migrating awesome_nested_set...
Migrating classic_pagination...
Migrating gravatar...
Migrating open_id_authentication...
Migrating prepend_engine_views...
Migrating redmine_scm...
==  AddRepositoriesCreatedWithScm: migrating ==================================
-- add_column(:repositories, :created_with_scm, :boolean, {:default=>false, :null=>false})
   -> 0.1317s
==  AddRepositoriesCreatedWithScm: migrated (0.1355s) =========================

Migrating rfpdf...

どうやらうまくいったっぽい?
redmine上からgitリポジトリを作成。すると・・・見事作成できました!!


redmineとgitの連携
http://d.hatena.ne.jp/CortYuming/20120430/p1
上記のサイトを参考に実施

2013年11月5日火曜日

RaspberryPiと戯れてみる 4 - Redmine導入 -

再OSインストール


色々ごちゃごちゃしてしまったので、一度クリーンな状態に戻そうとして、
OSを再インストールした時のメモ。

初回と同じ様にRPi-sd card builder v1.2.appを使用してSDカードに
書き込もうとしたらエラーが出てしまった。

「アクション“シェルスクリプトを実行 (Image to Card)”でエラーが起きました。
アクションの設定を確認してから、ワークフローをもう一度実行してください。」

以下サイトを参考にターミナルから直接書き込む
http://yohtn.hatenablog.com/entry/2013/07/18/154622

$ diskutil list
/dev/disk0
   #:                       TYPE NAME                    SIZE       IDENTIFIER
   0:      GUID_partition_scheme                        *251.0 GB   disk0
   1:                        EFI EFI                     209.7 MB   disk0s1
   2:                  Apple_HFS Macintosh HD            250.1 GB   disk0s2
   3:                 Apple_Boot Recovery HD             650.0 MB   disk0s3
/dev/disk1
   #:                       TYPE NAME                    SIZE       IDENTIFIER
   0:     FDisk_partition_scheme                        *15.8 GB    disk1
   1:                 DOS_FAT_32 PI                      58.7 MB    disk1s1
   2:                      Linux                         15.7 GB    disk1s2
$ sudo dd bs=1m if=/Users/{ユーザ名}/Documents/develop/Raspberry Pi/OS Install/2013-07-26-wheezy-raspbian.img of=/dev/disk1
dd: unknown operand Pi/OS
$ sudo dd bs=1m if=/Users/{ユーザ名}/Documents/develop/Raspberry_Pi/OS_Install/2013-07-26-wheezy-raspbian.img of=/dev/disk1
dd: /dev/disk1: Resource busy
$ sudo umount /dev/disk1
umount: /dev/disk1: not currently mounted
$ sudo mount
/dev/disk0s2 on / (hfs, local, journaled)
devfs on /dev (devfs, local, nobrowse)
map -hosts on /net (autofs, nosuid, automounted, nobrowse)
map auto_home on /home (autofs, automounted, nobrowse)
/dev/disk1s1 on /Volumes/PI (msdos, local, nodev, nosuid, noowners)
$ umount /Volumes/PI
umount: unmount(/Volumes/PI): Operation not permitted
$ sudo umount /Volumes/PI
$ sudo dd bs=1m if=/Users/{ユーザ名}/Documents/develop/Raspberry_Pi/OS_Install/2013-07-26-wheezy-raspbian.img of=/dev/disk1
1850+0 records in
1850+0 records out
1939865600 bytes transferred in 301.820387 secs (6427219 bytes/sec)

なんとか書き込めたっぽい?
ssh で接続 ・・・ IPが変わってしまっているが、気にしない。
rootユーザのパスワードを設定します。
?
pi@raspberrypi:~$ sudo passwd root
Enter new UNIX password:
Retype new UNIX password:
passwd: password updated successfully
pi@raspberrypi:~$

sudo raspi-config 初期設定
以下サイトを参考に実行
http://netbuffalo.doorblog.jp/archives/4578498.html

Redmineを導入してみる


1. mysqlをインストール
2. redmine用のmysqlパスワードを設定
3. http://IPアドレス/redmineでアクセス

とりあえず、起動してブラウザから操作できる事を確認。
んで、バージョン管理ツールとの連携をすべく、「Redmine SCM Creator」
なるプラグインをインストール。
http://mistymagich.wordpress.com/2011/10/19/redmine_and_subversion-git-mercurial-repository/

が、リポジトリ作成ができないorz  要調査。