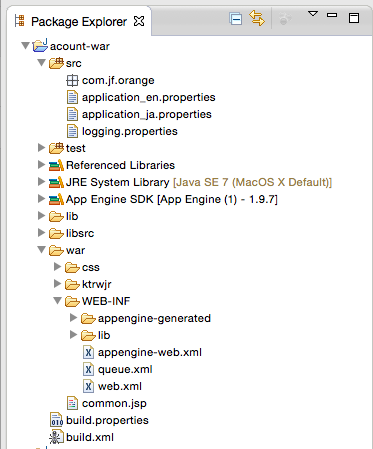
ControllerとJSPを見てみる
前回Antで作成したControllerとJSPがどんな風になっているのか確認。・IndexController.java
public class IndexController extends Controller {
@Override
public Navigation run() throws Exception {
return forward("index.jsp");
}
}
<%@page pageEncoding="UTF-8" isELIgnored="false" session="false"%>
<%@taglib prefix="c" uri="http://java.sun.com/jsp/jstl/core"%>
<%@taglib prefix="fn" uri="http://java.sun.com/jsp/jstl/functions"%>
<%@taglib prefix="f" uri="http://www.slim3.org/functions"%>
<html>
<head>
<meta http-equiv="Content-Type" content="text/html; charset=UTF-8" />
<title>Index</title>
</head>
<body>
<p>Hello Index !!!</p>
</body>
</html>
ControllerはSAStrutsでいう所のActionクラスっぽい。戻り値としてパスを含んだ
Navigationクラスを返却している。
JSP側はいつも通りっぽい。ただ至ってシンプルなのでデフォルトで配置されている
CSSを読み込む。
war/css/global.cssを読み込むようにjspを修正。
<%@page pageEncoding="UTF-8" isELIgnored="false" session="false"%>
<%@taglib prefix="c" uri="http://java.sun.com/jsp/jstl/core"%>
<%@taglib prefix="fn" uri="http://java.sun.com/jsp/jstl/functions"%>
<%@taglib prefix="f" uri="http://www.slim3.org/functions"%>
<html>
<head>
<meta http-equiv="Content-Type" content="text/html; charset=UTF-8" />
<link rel="stylesheet" type="text/css" href="/css/global.css" />
<title>Index</title>
</head>
<body>
<h1>Hello Index !!!</h1>
<p>page sample.</p>
</body>
</html>
変わった変わった^^
次にControllerとViewの連携をやってみる。それぞれ以下に修正。
・IndexController.java
public class IndexController extends Controller {
@Override
public Navigation run() throws Exception {
request.setAttribute("msg", "this is write in run function!!");
return forward("index.jsp");
}
}
・index.jsp
<html>
<head>
<meta http-equiv="Content-Type" content="text/html; charset=UTF-8" />
<link rel="stylesheet" type="text/css" href="/css/global.css" />
<title>Index</title>
</head>
<body>
<h1>Hello Index !!!</h1>
<p>${msg}</p>
</body>
</html>
継承元のControllerにHttpServletRequest requestが定義されている為使用できる。
index.jspではEL式でmsgを表示している。
↓実行結果
連携できている^^
ここまでをGAE側へデプロイしてみる
1. まずはGAE側でアプリケーションの登録を行う。以下へアクセス
https://appengine.google.com
2. 「Create Application」を選択し作成画面へ遷移
3. Application IdentifierとApplication Titleを入力し作成。
・Application Identifier ・・・GAE内でユニークとなるもの、サブドメインになる。
※右となりのチェックボタンで一意かチェックできる
・Application Title ・・・好きなタイトルを付けれる
↓作成完了
4. 「appengine-web.xml」の編集
<application></application>タグにGAE側で作成したプロジェクトの「Application Identifier」を設定する
5. プロジェクトをデプロイ
「GDT pulldown」メニューから「Deploy to App Engine...」を選択
実行!!
↓コンソールのログ
------------ Deploying frontend ------------
Preparing to deploy:
Created staging directory at: '/var/folders/6b/7v871n_x0273ts_v950blc8m0000gn/T/appcfg3099164888655695181.tmp'
Scanning for jsp files.
Compiling jsp files.
Scanning files on local disk.
Initiating update.
Cloning 34 static files.
Cloning 60 application files.
Deploying:
Uploading 7 files.
Uploaded 1 files.
Uploaded 2 files.
Uploaded 3 files.
Uploaded 4 files.
Uploaded 5 files.
Uploaded 6 files.
Uploaded 7 files.
Initializing precompilation...
Sending batch containing 7 file(s) totaling 16KB.
Deploying new version.
Closing update: new version is ready to start serving.
Uploading index definitions.
Uploading task queues.
Deployment completed successfully
↓ちゃんとデプロイできました^^


