最近、HTML5のCanvas上で拡大鏡を作ることがあったのでそのメモです。
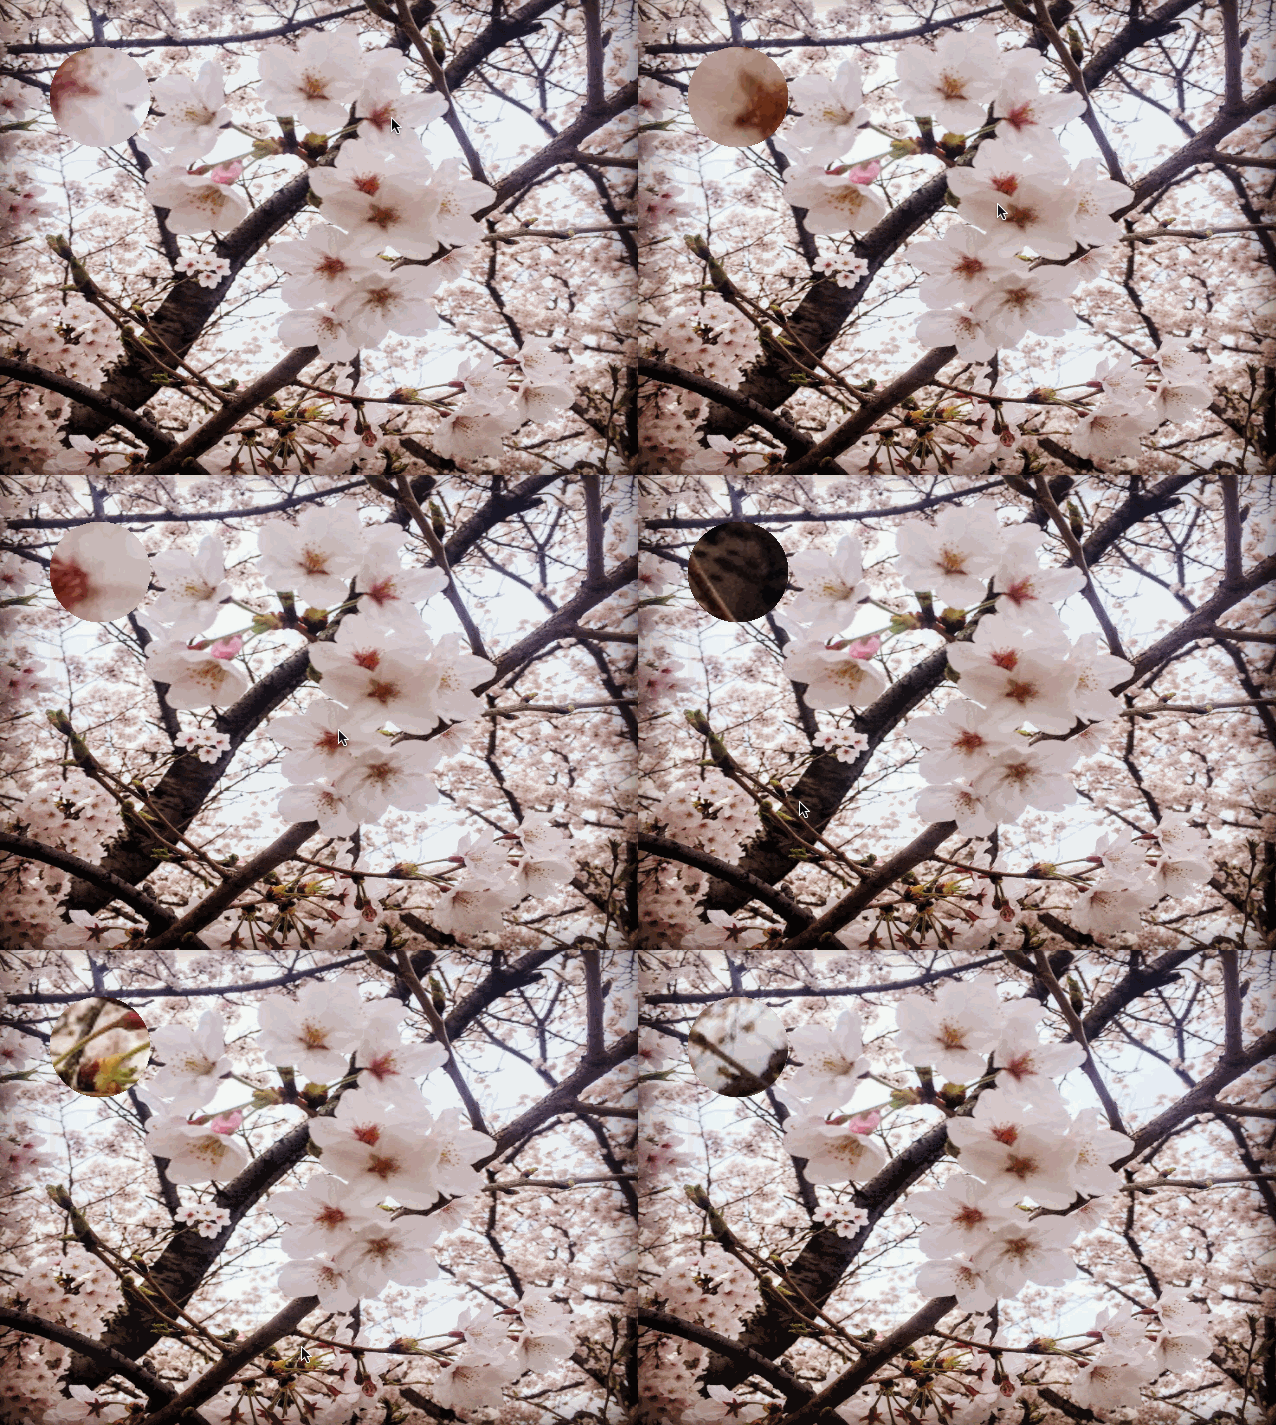
完成イメージ
まずは、完成イメージ↓
マウスの動きに合わせて拡大鏡が動きます。
実装
土台となるhtmlですが、
重ねる為
Z方向の位置を設定しています。
imgの上にcanvasのレイヤーを重ねてます。重ねる為
imgにはz-index: 1;、canvasにはz-index: 2;を指定し、Z方向の位置を設定しています。
- index.html
<!DOCTYPE html>
<html>
<head>
  <meta charset="utf-8">
  <title>loupe</title>
  <script type="text/javascript" src="canvas_loupe.js"></script>
  <script type="text/javascript" src="index.js"></script>
  <style>
    #container {
      position: relative;
    }
    #main_img {
      width: 640px;
      height: 480px;
      position: absolute;
      z-index: 1;
    }
    #loupe_canvas {
      position: absolute;
      z-index: 2;
    }
  </style>
</head>
<body>
  <div id="container">
    <img id="main_img" src="sample.jpg"></img>
    <canvas id="loupe_canvas" width="640" height="480"></canvas>
  </div>
</body>
</html>
次に実際の拡大鏡の処理を行う
canvas_loupe.jsです。- canvas_loupe.js
/**
 * canvas_loupe.js
 */

var loupe = {

  x: 0, // Current x.
  y: 0, // Current y.
  w: 0, // Image width.
  h: 0, // Image height.
  loupe_x: 50, // loupe x coordinate.
  loupe_y: 50, // loupe y coordinate.
  size: 50, // Crop size.
  zoom: 2, // Zoom rate.
  wide_size: 0, // Crop size * Zoom rate.
  image: null, // Image object.
  /**
   * Initialize.
   *
   * @param w Image width
   * @param h Image height
   * @param src Image src
   */
  initialize: function(w, h, src) {
    this.w = w;
    this.h = h;
    this.wide_size = this.size * this.zoom;
    this.image = new Image();
    this.image.src = src;
  },
  /**
   * Update coordinate.
   *
   * @param x
   * @param y
   */
  update: function(x, y) {
    this.x = x;
    this.y = y;
  },
  /**
   * Draw loupe.
   *
   * @param ctx context
   */
  draw: function(ctx) {

    var nx = (this.x * this.image.naturalWidth / this.w) - (this.size / 2);
    var ny = (this.y * this.image.naturalHeight / this.h) - (this.size / 2);

    ctx.save();
    ctx.beginPath();
    ctx.arc(this.loupe_x + this.wide_size / 2,
      this.loupe_y + this.wide_size / 2, this.wide_size / 2, 0, Math.PI * 2, false);
    ctx.clip();

    ctx.drawImage(this.image, nx, ny, this.size, this.size,
      this.loupe_x, this.loupe_y, this.wide_size, this.wide_size);
    ctx.restore();
  }
};
やってる事としては、、
- initialize画像のsrcと画像の幅、高さを引数で渡して、メンバに保存してます
- update
x,yの座標位置(マウスの位置)を更新しています。 - draw描画を行っている箇所です。まず
var nx = (this.x * this.image.naturalWidth / this.w) - (this.size / 2);
var ny = (this.y * this.image.naturalHeight / this.h) - (this.size / 2);
↑で実際の画像サイズと表示サイズを元に拡大鏡の描画位置を算出しています。
次にclipを使って拡大鏡の丸い形でくり抜く処理を行ってますctx.beginPath(); ctx.arc(this.loupe_x + this.wide_size / 2, this.loupe_y + this.wide_size / 2, this.wide_size / 2, 0, Math.PI * 2, false); ctx.clip();
最後に拡大した画像を表示させています。ctx.drawImage(this.image, nx, ny, this.size, this.size, this.loupe_x, this.loupe_y, this.wide_size, this.wide_size);
先にくり抜く形を指定しclipしてからdrawImageすると指定した
形で画像がくり抜かれて描画されます。
最後に拡大鏡の呼び出しやマウス位置更新の処理を行っている
index.jsです。- index.js
var ctx = null;

window.onload = function() {
  var canvas = document.getElementById('loupe_canvas');
  ctx = canvas.getContext('2d');

  canvas.addEventListener('mousemove', onMouseMove);
  loupe.initialize(640, 480, 'sample.jpg');

};

function onMouseMove(e) {
  loupe.update(e.clientX, e.clientY);
  loupe.draw(ctx);
}
マウス移動時
onMouseMoveにloupeを呼び出しています。
0 件のコメント:
コメントを投稿